Soup Du Jour on a Cold Day

When the weather is cold and I am shut up inside, the most natural thing to do is sleep. The second most natural thing to do is make something yummy. My go-to cold weather taste is usually chilly. However, on our first winter weather day home from school this semester, I opted for homemade chicken vegetable soup.

And once I start making it and I realized that I also needed to be working in my online classes, the most natural thing to do was…. write about the soup instead of working in my online classes. It might not have been the most prudent, but it was the most fun. Of course, I promise I did not let my students languish.

When the kids were younger, this would have been a project that we worked on together. I determined early on that both my son and daughter should learn how to do laundry and cook before I turned them loose on an unsuspecting world. And they both have mastered those tasks. But the learning process was fun, especially the cooking part. As they developed maturity and dexterity, I relinquished parts of the process to them, such as cutting up carrots, peeling potatoes, and such.

Now that they are both grown and almost out the door, they both had real work to do on this day also. So dad was on his own, except for the occasional request to have my son reach the top shelf or my daughter give me suggestions. He is good at top shelf reaching, and she is good at instructing.

Once we got the word that there would be a cold and frozen day, I made a grocery list and let Nick and Olivia divide and conquer to assemble the list of ingredients from the store before the frozen precipitation hit the ground.

INGREDIENTS:
Pepper, salt, dried parsley, and dried sage. (You will use these to taste, or as my daughter says, “until the voices of your ancestors tell you that that is enough.”)

Two 48-ounce containers of chicken broth. I prefer reduced salt. (I generally cook like I am feeding an army, but you can reduce the recipe as needed.)

Three good-size chicken breast. (I really prefer the flavor of dark meat. But deboned chicken breasts are easier to work with than having to debone thighs for soup.)

One stalk of celery

Two 16-ounce bags of carrots (I normally like to get the really large diameter carrots from the local veggie stand, but since we made the grocery list on a Sunday, that was not an option. Also, if you do not want to peel the carrots, baby carrots would be fine.)

One large onion (This time I opted for a large yellow onion.)

About three cloves of garlic or equivalent pre-minced (I keep whole garlic on hand but also a container of pre-minced in the fridge for quick use.)

Two cups of spinach (This was my daughter’s addition. She has recently fallen in love with spinach and had a 2-cup bag in the fridge.)

Approximately two cups of dried elbow macaroni (Why? Because my grandmother did it.)

You can add to this or take from as you wish. But this combination turned out to be really tasty. I liked that the flavor profile that did not use tomato products of any type. I love tomato! But it is a dominant flavor, so giving the family a different taste from tomato-based foods like chili or spaghetti sauce made for a delicious change.

Of course, one of the wonderful things about making a recipe like this is adding or taking away what you prefer or simply making it with what you have on hand.

COOKING INSTRUCTIONS:
You can go at this all at one time and probably get everything prepped, with the exception of waiting on the chicken breasts to cook, in about thirty minutes or less. However, this day was one of those go-at-your-leisure days. So I interspersed the food prep with the other activities of the day.

Begin with the chicken breasts. I like to use a steamer, but you may boil them as well. I seasoned them by coating one side with dried sage and parsley and pepper. I eye-balled this. Sage goes well with chicken, but I suggest less sage than the other two because it can be a bit overpowering. I use a pepper grinder because the whole peppercorns hold their flavor longer than pre-ground.) And I personally like a lot of pepper!

If you do not have a steamer, boil the chicken but do not overcook it. Remember you are going to move it to the soup mixture where it will continue to cook.

Steaming (or boiling) produced a nice broth, a cup or so, that I added to the soup mixture.

Once you get the chicken started, beginner vegetable prep. This will not take long.

I did a rough cut for most of the veggies. You can decide the size texture that you prefer.

I peeled the carrots and cut them into about quarter inch rounds. These were small diameter carrots. I usually like the larger ones that are about 1 inch around. They just seem to be sweeter.

I cut the onion into about quarter inch pieces as well. Sometimes I like to leave the onion and longer strips. Again, this is soup. Everything is going to get softer as you cook it. So the larger these pieces are the more integrity to the bite you will have if you begin with larger pieces.

With this in mind, I cut the celery into half inch pieces. And I throw in the leafy tops of the celery as well, the more the merrier. Be sure to rinse your celery good because it can trap sand and soil.

Rough mince the garlic.

After the veggies are prepped, pour your chicken broth in a 6 quart or larger pan and bring to a boil while you add the first few ingredients.

As I said, you can scale the recipe down if you wish. Yet if you have never cooked like you are cooking for an army, try it! For one thing, large quantities are more forgiving than small. If, for example, you get it too much salty, add water. Or if it looks like you have too many carrots, drop in more celery, even if it is just to get an aesthetically pleasing look. And really, prepping big does not take that much more time than preparing smaller portions.

It is also nice to have soup to share or for the next day. We ate this batch for lunch and supper and all three took it for lunch the next day and still had enough to share with my mother and sister.

Salt to taste as you go, but I like to get everything in the mix before I begin to add salt.

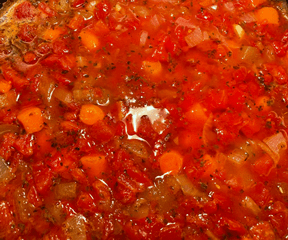
As the broth comes a boil, add the veggies first that take longer to cook. Add the elbow macaroni in early as well. (I actually boiled my pasta in a separate little pan and then poured it into the soup mixture, but that really was not necessary in hindsight.)

Cover to cook, but if you want the soup to reduce, then leave uncovered. Generally, however, you do not really want your soup to boil away.

I started with carrots and then onions. Let them boil a while, but you do not want them mushy.

After that, reduce your temperature to a simmer, keeping the pot covered. Add the pasta. After a time, add the celery because it does not take it that long to soften up. Finally add the spinach or any leafy green of your choice at the end. It wilts quickly. Different greens will bring their own flavor. The spinach was a nice addition. (Credit goes to my daughter.)

Somewhere along the way my chicken was finished steaming. I let it cool just enough to touch. I do not have the cooking hands my Grandmama Burton did. It seemed like she could just about stick her hands into a boiling pot of water. But I am a little more delicate.

I cut the chicken into small cubes, which of course eventually fell apart in the soup. I am not really sure exactly when in the cooking process I added the chicken. So just add it whenever yours are ready. And I as previously indicated, add the broth that cooks off the chicken to your soup. It really gives the flavor a kick to add the fresh broth.

After all your ingredients are combined, let it simmer to you have the texture you are looking for the veggies. I like mine crisp. The kids like theirs a little softer. It is all up to your mouth.

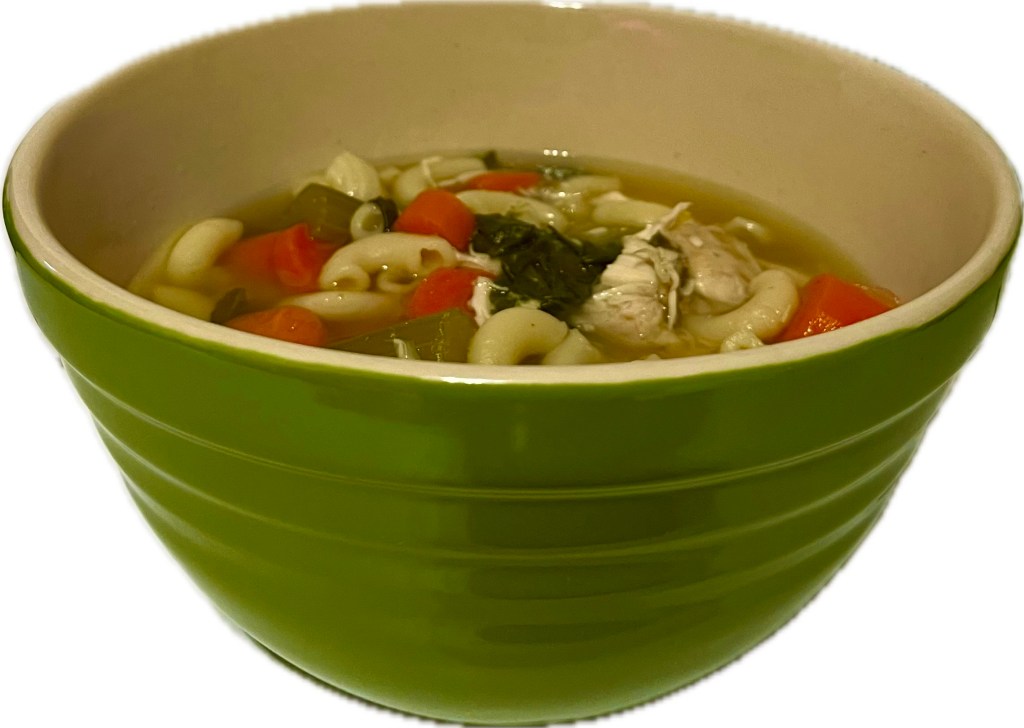
PLATING (or is it BOWLING?):
Grab a big ladle and fill a bowl or two or fifteen… The good thing about this soup is you can eat a lot and feel full but not feel guilty. This is a hearty, tasty soup with a nice mix of ingredients, yet it is a low calorie meal (unless you eat it with my son’s homemade bread).

The next time you are going to be cooped up in the house, give this a try. And if you have some budding little cooks at the house, this is a good family project with just a little oversight. Carrots are fun to peel with a potato peeler. If you use the smaller diameter, carrots, they are easier for small hands. Onions are not that difficult to cut. Celery is not difficult at all. Plus, you can fill a bowl with water and let the kids give the celery the good rinse it needs.

Be careful lifting the lid off the pot. You do not want to get burned by the steam. This is probably something you only want to let your older helpers do if you do not do it yourself. Show them how use a pot holder to lift the lid pointed away from them, shielding them from the steam that is released from the boiling pot.

Tossing the veggies into the soup, as I learned with my own little cooks, is a temptation for them. Of course, this makes a great splash, which is a burning hazard and makes a tremendous and unnecessary mess. Instead, instead teach them how slide the veggies into the soup from a small cutting board or plate, being careful not to let the soup splash on them.

And if you make it fun, your junior chefs will do a lot of your cleanup as well. (Yes, I am sneaky like that.)

Whether you go it alone as I did this day or you make it a family project, I hope you have a good time making this tasty, filling soup!

Onion Rings and Eggs

If you know the sweet flavor of cooked onions, you can already imagine how delicious this simple breakfast dish is.

If you think you do not like onions, that is because you have only been exposed to raw white onions on a hotdog at a bad hotdog stand.

This version of the recipe is mine, but the idea occurred to me from a reel I encountered when scrolling on Facebook. I didn’t stop to view it. I was already hungry and that little nudge was all I needed to decide what breakfast should be today.

Ingredients:
Olive oil
Eggs
Sausage or other meat
Grated cheese of choice
Onion
Peppers of choice
Garlic
Salt
Ground black pepper
(Other ingredient options, such as mushrooms or tomatoes, are only limited by your imagination and pantry.)

Prep:
Set your shredded cheese out and let it come to room temperature while you work on the other ingredients. This will allow it to melt faster when you begin cooking.

Rinse and cut off the top and remove the seeds from the peppers. I had one Marconi and one Sweet Banana Pepper from the garden. For more heat, you might choose Jalapeño or Serrano. You know what you like or what you have handy. I decided on these peppers because they were the peppers I had in my garden, but they worked well together.

Mince the peppers. In addition to providing flavor and potentially heat, the peppers provide texture, so don’t cut them too small.

Mince a small bit of the onion, roughly an amount equivalent to one pepper, also purely for the sake of texture.  

Mince one to two cloves of garlic.

Every type of onion brings its unique flavor to this dish. Today I used a red onion because I had one on hand. Then again, I usually do have one on hand because I like cooking with them. Goldie Locks would agree. They have just enough punch to taste oniony, but mildly so, when raw. Cooked or raw, they have a gentle sweet flavor, which holds up well when cooked, so they tend to be my go-to onion. But to each his (or her) own, white, yellow, or any other variety would work.

More than thirty years of teaching have taught me that some things that should not have to be said frequently have to be said — Peel the onion.

Next, cut the onion horizontally into a quarter or half inch rounds. After cutting the onion into rounds, take each slice and gently push out the individual layers. Each slice will naturally have rings that can be separated by lightly pressing them apart with your fingers. The rings will vary in size. Decide which size rings you want to use, or use a variety of sizes if you wish.

By the way, unless you are cooking for an army, you will have more than half of the onion left. Fortunately for me, Monday is Labor Day, so the remainder will be used with burgers and hotdogs. Onion slices will keep well for a few days stored in the refrigerator.

If you have read any of my cooking narratives, you know that part of the process is using what you have on hand instead of running to the store for ingredients. Earlier in the week I made cheese greets with Italian sausage. I had one sausage left, so I crumbled it. But you can use cold cuts or bacon or even omit meat. If you are working with uncooked meat, especially pork, cook it before you mix it with the eggs. The cook time for the eggs will not be long enough for uncooked meat to cook adequately.

I was making enough for the family, my band of Three Musketeers (and sometimes Three Stooges), so I used five eggs. Crack them into a small mixing bowl and whisk. Whisking not only mixes the whites and yolks, it aerates, creating a fluffy texture. Next, combine the other ingredients. Salt and pepper to taste. If you are not sure how much salt or pepper, you could wait until you begin to cook the eggs for salt and pepper if you prefer or even wait until they are cooked.

Salting tip: You should use just enough salt to bring out the flavors. You never want to taste the salt. As for pepper, I like lots of ground black pepper. I have my mother’s palette. She virtually covers her eggs with black pepper.

Add the shredded cheese and continue to mix. (I did not have any shredded cheese in the fridge, but I did have sliced Colby Jack. I tore two slices into small pieces, which worked fine.)

Cook:
Once the egg mixture is prepared, add olive oil to a skillet and heat. I usually turn the heat up high and then back down after the oil heats up. There is no particular culinary reason that I know of for this. It has more to do with my impatience. Once the oil is hot, turn the heat to medium low.

Take the skillet off the heat to add the onions. This will reduce the likelihood of the oil popping on you. (I experimented with a couple of techniques. This one worked the best.) Your onion rounds will have a bit of a funnel shape because of the natural shape of the onion. Place them in the oil with the larger aperture facing up. Return to heat. If you notice, the onions will begin to gently change color and texture from the bottom up as they cook. After about twenty to thirty seconds, flip. Cook for twenty or thirty more seconds, depending on the size of the slice, and then flip again.  You don’t want to brown them. Just barely begin the caramelization process.

With the funnel end up, add the egg mixture inside the rings. For this, I used a gravy ladle. I coated it with oil to keep the eggs from sticking. I have no idea if coating with oil really made any sense or helped, but using the ladle was more manageable than pouring from the mixing bowl. Be careful not to overfill the rings. If you do, eggs will spill out into the skillet as you cook. (Yes, I learned this from experience today.) Some might seep underneath the rings also. That’s ok. Just gently pull them away from the rings before you try to flip them.

Skillet tip: Use a griddle or at least use a shallow skillet to make maneuvering the rings easier while they cook. Also, do not place too many rings in the skillet at the same time. It makes it harder to individually flip them without bumping the others and spilling the egg mixture.

Let the eggs cook. When there is just a slight bit of uncooked egg left on top, flip the rings. I settled on a small, thin spatula. From my several attempts, it worked better than a larger or thinker spatula. Let them cook just long enough for the remaining uncooked egg to get done or cook longer if you want the egg to brown a little.

Plating:
Remove from oil and place on a plate. It will not take them long to cool enough to eat.

I plated the onion ring eggs with some of the leftover grits from the cheese grits and Italian sausage from earlier in the week. (Plated, I sound so fancy.) The grits were not watery instant grits. They were rich and thick with cheese, butter, and chicken stock and paired nicely with the onion rings and eggs. (Paired nicely, yep, my diction is definitely getting fancier.)

The onion rings and eggs were delicious, and I ate more than my share!

Postscript: Did you know that due to their high fructan content, a type of carbohydrate that can cause gas and bloating, eating too many onions can cause a tummy ache? Yeah, I learned that from experience today too. But it was worth it.

Vegetable Medley Over Pasta or Rice

Last Saturday morning, I let myself sleep in. Correction, I made myself sleep in. The first week of the semester always disrupts my circadian rhythm. I had gotten four, no more than five hours, sleep every night for a week. And true to form, I woke up at 3 a.m. but put myself back to bed at 5 a.m. for a few more hours.  Even after I got up, I was moving slowly, so no breakfast. And then once lunch rolled around, I wanted something good. But I did not want to go to the store or any great trouble.

And then there it was, inspiration, a single Ichiban eggplant lying on the table.

With the eggplant in my mind, I scanned the fridge and came up the following tasty lunch idea.

Ingredients:
Eggplant
Bell pepper
Carrot
Onion
Garlic
Oregano
Olive oil
Red pepper flakes
Salt
Lemon juice

Prep:
I recently learned a French culinary term from a TikTok video –  mise en place (pronounced meez awn plahz), which literally translates to “everything in its place.” This is good advice. But I don’t speak French, so I’m  just going to say before you begin cooking, make sure you have everything in place – all the veggies peeled and cut, skillet ready, everything.

Peel the eggplant. You don’t have to, but I prefer peeled. Then cut it into small pieces, in this case, about half inch rounds. Toss the eggplant into a bowl of salt water to soak while you prep the other ingredients. The saltwater helps pull some of the bitter taste associated with eggplant. Fresh eggplant is less likely to have the bitter taste, but soaking them in the salt water is still a good idea.

Peel and cut the carrot(s) into about quarter inch pieces. (I like large carrots. They tend to be sweeter. The one I had was about a two-inch circumference. So I peeled and quartered it and then cut it into pieces.)

Rough dice half an onion. (In this case I had a yellow onion, but any kind works.)

Core the bell pepper and dice. (My bell pepper was yellow, but like the onion, whatever you have on hand is fine.)

Mince two to three cloves of garlic (Pre-minced garlic works if you don’t have whole garlic.) 

Cook:
Preheat your skillet to medium low heat and add olive oil.  

Add the carrots and lightly salt. As you add the other ingredients, add additional salt and olive oil as needed. Be sparing with the salt, but don’t be stingy with the olive oil.

Cook for about three minutes and then add the onions and eggplant. Stir as you add each ingredient.

Continue cooking and add the bell pepper after about three more minutes. 

Finally after a few more minutes, add the garlic and two tablespoons of oregano, not that I actually measure. Add the red pepper flakes to taste for a little heat. 

For crispier vegetables, don’t cover as you cook. If you prefer the vegetables to break down more, then cover with a lid in between stirring. Just before you take the veggies off the heat, hit them with a little lemon juice. The acid of the lemon balances the oil and overall brightens the flavor of the veggies. (Confession, sadly I forgot to do this. But I use this tip enough to know what the effect would have been. I will definitely remember next time.)

When you are satisfied with the consistency, serve over rice or pasta.

Plating:
I had leftover spaghetti in the fridge, so I heated it up and spooned the veggies over the spaghetti and sprinkled with grated Parmigiano Reggiano. 

Continuing with the theme of what’s on hand, I heated up some ground Italian sausage from earlier in the week and added a sliced tomato and basil fresh from the garden. 

I must say, it was all yummy. 

Now go be creative with what you have at the house. You might just surprise yourself.

Quick and Easy Salsa

Today for lunch, my daughter Olivia and I are having taco salad with homemade leftover salsa that I whipped up last night. My son Nick is in Atlanta on a video/photo shoot and is probably going to eat somewhere fancy, but I doubt it will top our lunch because this quick and easy homemade salsa is even better the second day than it was last night.

Speaking of last night, we had a bit of confusion about dinner. I had told Nick I would make spaghetti sauce this week and sent him to the store for groceries, but I forgot I had told Olivia we could have taco salad. Nick purchased groceries for sauce but had did not get salsa, of course, and we did not have any on hand. So, I pulled a can of diced tomatoes from the groceries Nick had purchased for spaghetti sauce and then went to the pantry to see what else I could find to save a trip back to the store for salsa. In the process, I came up with this “quick and easy” salsa.

Prep time: 10 minutes/Feeds: 2 to 5

10-ounce can diced tomatoes with chilies (mild or hot)
14.5-ounce can diced tomatoes
Half a chopped onion (I had a red onion at the house, but I think a white onion would be better.)
1 or 2 garlic cloves or a teaspoon (more or less) of ready-to-use minced garlic
Cilantro to taste (We had dried, but fresh cilantro would kick the flavor up a notch.)
Juice from a lime or 2 tablespoons of bottled lime juice  (I did not have a lime and did not measure the bottle lime. I just eyeballed it. Use enough to give the salsa a touch of citrus.) 
 

Blend to desired consistency with a food processor or hand emulsion blender.

It is that simple! And it really is tasty.

The next time you forget the salsa or if you just feel adventurous, open the cabinet and put this homemade salsa together. Experiment with your favorite ingredients. You might never go back to store bought salsa again.

A Christmas Greeting Calligram and a Christmas Letter

Instead of a photo and a poem this Christmas, I got creative (maybe) and opted for a calligram, a visual image and poem in one. A calligram, sometimes called a concrete poem or visual poem, is poetry in which the arrangement of words creates a visual image, in this case a Christmas tree. The poem is comprised of Christmas greetings in numerous languages. Almost all the greetings are in languages that are spoken by my friends across the globe. But just for fun, I added an Anglo-Saxon greeting in runes, though I doubt Alfred the Great is going to read my poem. And I included Latin, you know, just in case the Pope does read it.

Additionally, I decided to share an old-fashioned Christmas letter. Back in the day, Christmas letters shared the news of the year and holiday greetings. I loved getting them, especially from my cousin Diane in Houston. Of course, Christmas letters have become a thing of the past since we share each other’s lives in real time on social media. At least, I know you guys see my antics online because you tell me about it. Anyway, here we go.

My family and I have had a blessed year, and I am grateful to God for his blessings. Olivia and Nicholas both graduated from Athens State University. Olivia and Emma, her traveling pal, headed to Korea for two weeks right after graduation to spend time with two special friends, Fred and Reneea, who serve at school in Pohang. When she returned, she accepted a position with the Marion County School System as a science teacher at Brilliant High School, where she is also the band sponsor. The job keeps her busy, but she seems to be doing well.

Nick, on the other hand, only drove to Jasper after graduation where he served as the Interim Director of the Walker County Arts Alliance for several month. Additionally, he is a social media manager for Blanton Media Group, the publisher of 78 Magazine and The Walker Leader. He is learning a lot about real-world application of the skills he attained at Athens. And just to round things out, he is working on an M.A. in Visual Communications. In fact, he just got his first grades – all A’s.

The extended family is doing well also. Mom is still sharp and sassy as ever, and all things considered, doing rather well. We are all excited about the latest addition to the Rizzo clan. My nephew Chase and his wife Britney had a baby boy, Martin Joseph Rizzo, in November. He is absolutely adorable! As you can imagine, we are all beside ourselves excited about Martin’s arrival.

Finally, our congregation is blessed as well. I cannot share everything, but I will mention two additions to the church this year. Blaine Johnson joined our ministry team this year as the music pastor. He is talented, motivated, and caring. The growth in both quantity and quality of our music ministry under his direction was apparent in our Christmas service. (Find it on Facebook or Youtube at Sumiton Church of God.) And Jonah Barrett has taken on a volunteer position of Young ACollege/Young Adult Pastor. I have known him since the day he was born and am so proud of the young man he has become. His late father, Reverend DeWayne Barrett, a dear friend of mine, would be proud of his son as well.  For these and all God’s blessings, I am truly grateful.

To close, over the last few Christmases I have participated in a tradition where friends and I share recipes with each other. Last year, I shared a photocopy of my grandmother’s handwritten fruitcake cookie recipe. This year, I would like to share a Greek feta cheese dip called bouyourdi.

Ingredients:
Greek feta (Get the good kind in brine water, not the crumbled, dry feta.)
Tomatoes (It is so much better with fresh heirloom tomatoes, but even canned diced tomatoes will work.)
Peppers (Traditionally a sweet bell pepper is used, but I have used all kinds depending on what I have on hand, such as pepperoncini, roasted red peppers, etc.)
Ground oregano
Olive oil
Additional toppings can include olives and thinly sliced onions.

Directions:
Place the feta in a small baking dish. Layer the tomatoes and peppers on top. Add any additional toppings you wish. Sprinkle with oregano. I love oregano, so I use a lot. If you’re new to using oregano, start out with just barely more than enough to be seen. Drizzle with olive oil. Don’t be stingy with the oil.

Bake at 350 degrees for about forty-five minutes. At about fifteen minutes in, give it a stir to mix the ingredients. (If you’re impatient like I am, you can microwave it, but it tastes better baked slowly.)  Feta cheese does not become stringy like most cheeses. Instead, it has a nice creamy consistency when melted.

Pair with pita bread or chips or a nice, toasted bread of your choice. It is great as an appetizer or a snack.

When I make bouyourdi, I am reminded of a visit to my dad’s family in Galveston something over twenty years ago. We met up with dad’s cousin Mary, better known as “Wee,” and decided to go to his cousin Sonny Martini’s place for lunch, unaware that Sonny had moved his restaurant. When we arrived, we found a new restaurant and its owner, a nice Greek gentleman, instead of Sonny. But that was OK. We spent the next hour or so chatting with each other and with him, talking about Greece and family (Dad’s grandmother was Greek) and enjoying slice after slice after slice of warm feta and olives.

That was one of those times that was just perfect for making a memory. And though Dad and Wee have both passed, I go back in my mind to that day and live it over with them. My hope is that you might make similar memories and enjoy a warm plate of bouyourdi with your family and friends.

Merry Christmas!

I Drink Coffee Now…

My dad’s family is Greek and Italian, two cultures with coffee traditions dating back for centuries. 

Greek coffee is strong. It is made in a special pot called a briki. A briki is a small copper pot. Fine ground coffee is placed in it. As the coffee boils, a foam forms at the top of the briki while the grounds settle to the bottom. Greek coffee is meant to be enjoyed slowly and savored. 

Americans tend to be more familiar with Italian coffee, particularly espresso. (My daughter will be quick to correct you. “It’s espresso, not expresso!”) Espresso is also made with fine ground coffee, which is then combined with very hot water under pressure. This is what causes that characteristic hiss from an espresso machine. 

But a cultural connection to coffee is not why I drink it, although it is amazing what you can find when you Google something.   

My mother and grandmother drank coffee all my life. Well, actually my grandmother took a little coffee with her milk is a more accurate description. 

But a family tradition is not why I drink coffee.

I drink my coffee decaffeinated and black with a spoon of local honey. (According to my doctor, the local honey can help with my allergies.) Since my coffee is decaffeinated, I do not drink it for an energy boost. Supposedly there are health benefits to coffee, but that’s not why I drink it. (I could just take the honey straight without the coffee.) And it certainly is not the taste! I cannot stand the taste of coffee. 

So why do I drink coffee?

Because I am old enough.

I used to joke that I was not old enough to drink coffee. But this year I had one of those birthdays, you know, that kind that ends with a zero. So I figure maybe now I am old enough. 

Zero birthdays mark milestones. 

The first zero birthday marks the beginning of double digit birthdays. It is a big, round number that sets you apart from the other kids. With the second zero birthday you leave your teens and begin to move toward adulthood, at least hopefully, though in our Western culture of affluence, at twenty just as at ten most are not thinking about anything or anyone beyond the moment and themselves. They are just enjoying life. They are free with limited responsibilities, and I suppose there is nothing wrong with this. 

Of course, by the time the third zero birthday rolls around, you really should not be living in your parents’ basement. You are thirty; you are grown now. Get a job! Somewhere after that second one and definitely by the third, most people are still focusing on themselves but in terms of career and family. The next several zero birthdays seem to come faster and faster and with more responsibility and change. 

For example, on my last zero birthday I had just become a single parent with the custody of two young children. (This is when I probably should have started drinking caffeinated coffee because I needed the energy.) Life was busy and very uncertain. In fact, the only certainty was the knowledge that my job was to focus on raising my two children and everything else centered around that. It made differences in my career choices, my friendships and associations with others, virtually every aspect of my life was touched and re-focused on them, and it has been that way for the last decade. I am not complaining. I have said repeatedly that dad is my favorite job. But it is work. There was homework and band practice and recitals and more homework and teacher conferences and homecoming dances and more even homework and first dates and everything that goes with raising children. My involvement in my church and community was focused on helping my children engage and making those areas better for my children. Hopefully, anything I advocated for helped others as well. But the reason I showed up to the band boosters and parent teacher organization meetings was because of Nick and Olivia. Yet now, they are almost grown and on their own, having both now celebrated two zero birthdays. 

So as I greeted my most recent zero birthday, it was with the realization that my kiddos were nearly grown and the compelling task of most of my existence was almost complete. Of course, I will always be their dad. You never outgrow your father, even after he is gone. But you do grow into a different relationship with your parents. I recognized my kids were almost there. And in the process, I began to wonder who I was and what was next. Yeah, I know this is a first-world problem, but it is still a problem. 

I struggled through it a bit, and then I started drinking coffee because I was finally old enough. In fact, I was several zero birthdays old enough. 

About this time, one of my Greek friends shared a picture of figs from a tree that his dad had brought from Greece. His dad had long since passed, but his children, grandchildren, and great-grand children were still reaping the fruits of his labor. I responded to him with a Greek proverb: “A society grows great when old men plant trees in whose shade they will never sit.” By the way, I am not old, but it helped me begin to frame my thinking about this zero birthday and beyond.

Similar to the wisdom of this proverb, there is a passage in Genesis that is often lost on those who are not from the Middle East: “Abraham planted a tamarisk tree in Beersheba, and there called on the name of the LORD, the Everlasting God” (Genesis 21:33). The tamarisk tree is sometimes called a salt cedar. It is well-adapted for inhospitable climates and can grow into a large tree that provides shade from the heat of the sun. But Abraham was not going to sit under the shade of the tree. Even the long life of a Biblical Patriarch would not be long enough for the tree to grow to full maturity to provide shade for Abraham. Instead, Abraham planted the tree trusting God’s promise that the land it was planted in would belong to his children and grandchildren and great-grandchildren and generations to come. I wonder what Abraham pondered about the fulfillment of God’s promises as he watered and tended the tree as a young sprout. 

So now I drink coffee, my version of a tamarisk tree. It reminds me that between now and the next zero birthday to keep doing what I have been doing. From the outside, it probably will not look all that different. I will still work to improve my community. I will remain involved with the local school system, to the delight or dismay of the school administrators. I will continue to communicate with my elected officials. I will participate in my church, hoping to make it better, not just for me or even my kids but for generations yet to come. 

Realizing my life and my work is not just about me helps me take this zero birthday in stride. I do not mean to aggrandize. After all, I am just drinking coffee, planting trees, and trusting in the promises of God.

Cucuzza

Last week we had a diversity event on my college’s campus, and I was asked to prepare a booth on Italian-Americans. Since October is Italian-American Heritage Month, I thought I would share some of it as a blog as well. (Oh, and I’ve included a tarantella to put you in the right mood while you read.)

“Tarantella Americana for Clarinet and Piano” (c) 2021 Stephen W. B. Rizzo

There’s a litney of contributions by Italian-Americans I could have shared and a long list of names, nationally and locally, all of whom deserve recognition. But instead, I opted for something more basic, something we share, something that reflects us as a group – good, hearty, and comforting food. 

As with other immigrants, when Italians came to America most were leaving behind a difficult life in hopes of a better future. The bulk of Italians who made the Atlantic crossing were mezzogiorni  or Southern Italians, which reflected the historic reality that Southern Italy was significantly less prosperous than Northern. While in Italy, they lived and made the most of what they had. An example of this is the cultivation of cucuzza, an edible gourd that can grow up to five feet in length. 

The plant requires little space when trellised and is a prolific producer.

Southern Italians made the most of the plant, consuming both the gourd and its tender shoots and leaves.

Tenerumi

Tenerumi is made from the (deveined) leaves and tender shoots sautéed with garlic. Cucuzza can also be incorporated into soups and stews, stuffed, breaded and fried as a stand-alone dish or incorporated in cucuzza parmigiana, or served raw in salads.

As they immigrated, Italians brought the seeds with them. Today, it’s not uncommon to find cucuzza in the gardens of Italian-Americans across the country.  

Cucuzza Stew

If you are fortunate enough to have an Italian-American neighbor who grows cucuzza, ask for one. Trust me, they will have extras. Like I said, these plants produce. If you’re not as fortunate, then you can probably find cucuzza in a market that specializes in Mediterranean food or sometimes in Asian markets as well.)

Ingredients

One large cucuzza (3 or 4 feet long)
A large bunch of carrots peeled and chopped or large bag of baby carrots.
Three or four garlic cloves chopped
Two large (28 ounces) cans of petite diced tomatoes
(Fresh tomatoes are better if they are homegrown. But don’t use the tasteless ones you get from most groceries.)
Optional – one large can of tomato puree
Oregano, salt, and pepper
You can also add celery, potatoes, etc., pretty much veggie that strikes your fancy, of course. Adding stew meat is also an option.

Directions

Peel the Cucuzza. Slice it down the middle longways. Clean out the soft  interior with seeds. I usually use a spoon to scoop this out. Then cut the cucuzza into roughly half inch cubes.

In a ten quart soup pot or crockpot, combine cucuzza, carrots, diced tomatoes, and garlic.

Add dried or fresh chopped oregano, salt, and black pepper to tastes. (I really like oregano, so I tend to add a little extra.) Add two to four cups of water as needed water. 

You will probably need to cut the acid of the tomatoes. For this batch, I used about a tablespoon of sugar. Don’t worry, it does not make it taste sweet. It just balances the acid. There are other options as well. Mr. Maltese, one of my music  instructors from my undergraduate years added raisins to his sauces. I do this for sauces, but tend not to do it for soups and stews. Another trick that I have used is adding a whole, peeled Russet potato, which you remove before serving. Baking soda also could be used.

Bring to a boil and then reduce the heat and simmer until the vegetables are tender. I usually like to let it set overnight to allow, as a friend says, the flavors to marry. 

Buon Appetito!

Banana Heads

I enjoy cooking, and since I’ve been sheltering in place because of the threat of COVID-19 on every door handle and shopping cart, I’ve had more than enough time to cook. As I was throwing a handful of raisins into the sauce today, my mind drifted back to my undergraduate days. (Don’t be shocked at the raisins. They balance the acid and bring out the sweetness of the tomatoes.)

My first degree was in music from Jacksonville State in the middle of rural Alabama. Ironically, it was there in the foothills of the Appalachians of all places, I met a petite Italian (Sicilian)-American, Mr. Giovanni Maltese, who has remained special in my memory. He taught music appreciation, music literature, and class strings. He was a particular pleasure to be around, though if you talked during class he would keep you in line by admonishing, “Shut up, you bunch of banana heads, and listen to the damn music.”

Beyond his passion for music, one of the things that endeared him to me was how he welcomed his students into his home. As with the Maltese family, my dad’s family came from Sicily. Dad tells stories from his childhood of his father cooking spaghetti sauce overnight and of big family lunches on Sundays at Aunt Katti’s after she had spent half the night cooking. In similar family style, Mr. Maltese invited his classes to his home at the end of each term.

The memory of an evening at his home, as one friend said, is like a dream now, just yesterday and yet forever ago at the same time. That night his students arrived to find several small tables set around. Sauce was simmering. The smell, oh, the smell. He placed the sauce and pasta on the tables, along with bowls containing various meats. We sat. He bowed his head and offered thanks. As the meal began, he lamented “a rude student” who some years before had wandered around “looking for God under the tables” after grace. Then I tasted his sauce for the first time, biting down on a raisin plumped with sauce. Ever since, raisins have been in my own sauces. Beyond this, the details of that evening fade to shadow, except for the feeling of welcome and home that permeated the evening and has followed me for forty years.

A few years ago before Mr. Maltese passed away at the age of 95, I contacted his son John for the recipe that I recall enjoying around the table, after thanking God for the meal of course.  

I share the recipe below and hope you enjoy it, as well as the love of family and friends around the table again soon. I pray we will recall how being apart from each other felt and allow that to make each meal and each moment all the more special. I think Mr. Maltese would agree, and I think he would also remind you to thank God for your meal… and your health.   

In John’s words and shared with his permission, here is the sauce that Mr. Giovanni Maltese learned from his mom from Trapani, Sicily.

It’s very easy. Use cans of tomato paste (two cans of water per can of paste) as the base. I usually add a can of tomato puree. You can make as much or as little as you like, but if you add a lot of meat, you’ll need a fair amount of sauce (for this pot I used 16 ounce cans of paste – remember to add the two cans of water per can of paste) and one 28 ounce can of puree. That’s quite a bit of sauce, but I’m cooking for a lot of people, and I want leftovers (the sauce freezes well). Simmer. Peel a couple of large onions and add 8-12 cloves of garlic (leave them whole) and brown them in olive oil and add them to the sauce. Then brown some sweet Italian sausage and add it. I do the meatballs by feel: ground beef, Italian bread crumbs, grated Parmesan and Romano cheese, lots of finely chopped garlic, parsley, pepper, garlic salt, and enough eggs so that the meat won’t fall apart. Brown the meatballs and add them to the sauce. Sometimes I add breaded chicken or veal cutlets (also browned in olive oil before being added), pork chops, even chopped zucchini. Add a couple handfuls of raisins. Simmer over low heat for about three hours. It tastes best if you refrigerate it overnight and simmer it again for about an hour or so the next day before serving. Believe it or not, there’s no other seasoning – the garlic, onions, and meat add plenty of flavor. Mangia!